When I would see the pictures of all of the incredible jack-o-lanterns every year, I never thought that I would be able to accomplish some of these incredible designs. While I’m no where near the artistry of most of the beautiful pumpkins you see posted, I will say that some of the designs are easier to create than I ever thought they would be. Here are two of our most recent pumpkin carving ideas.
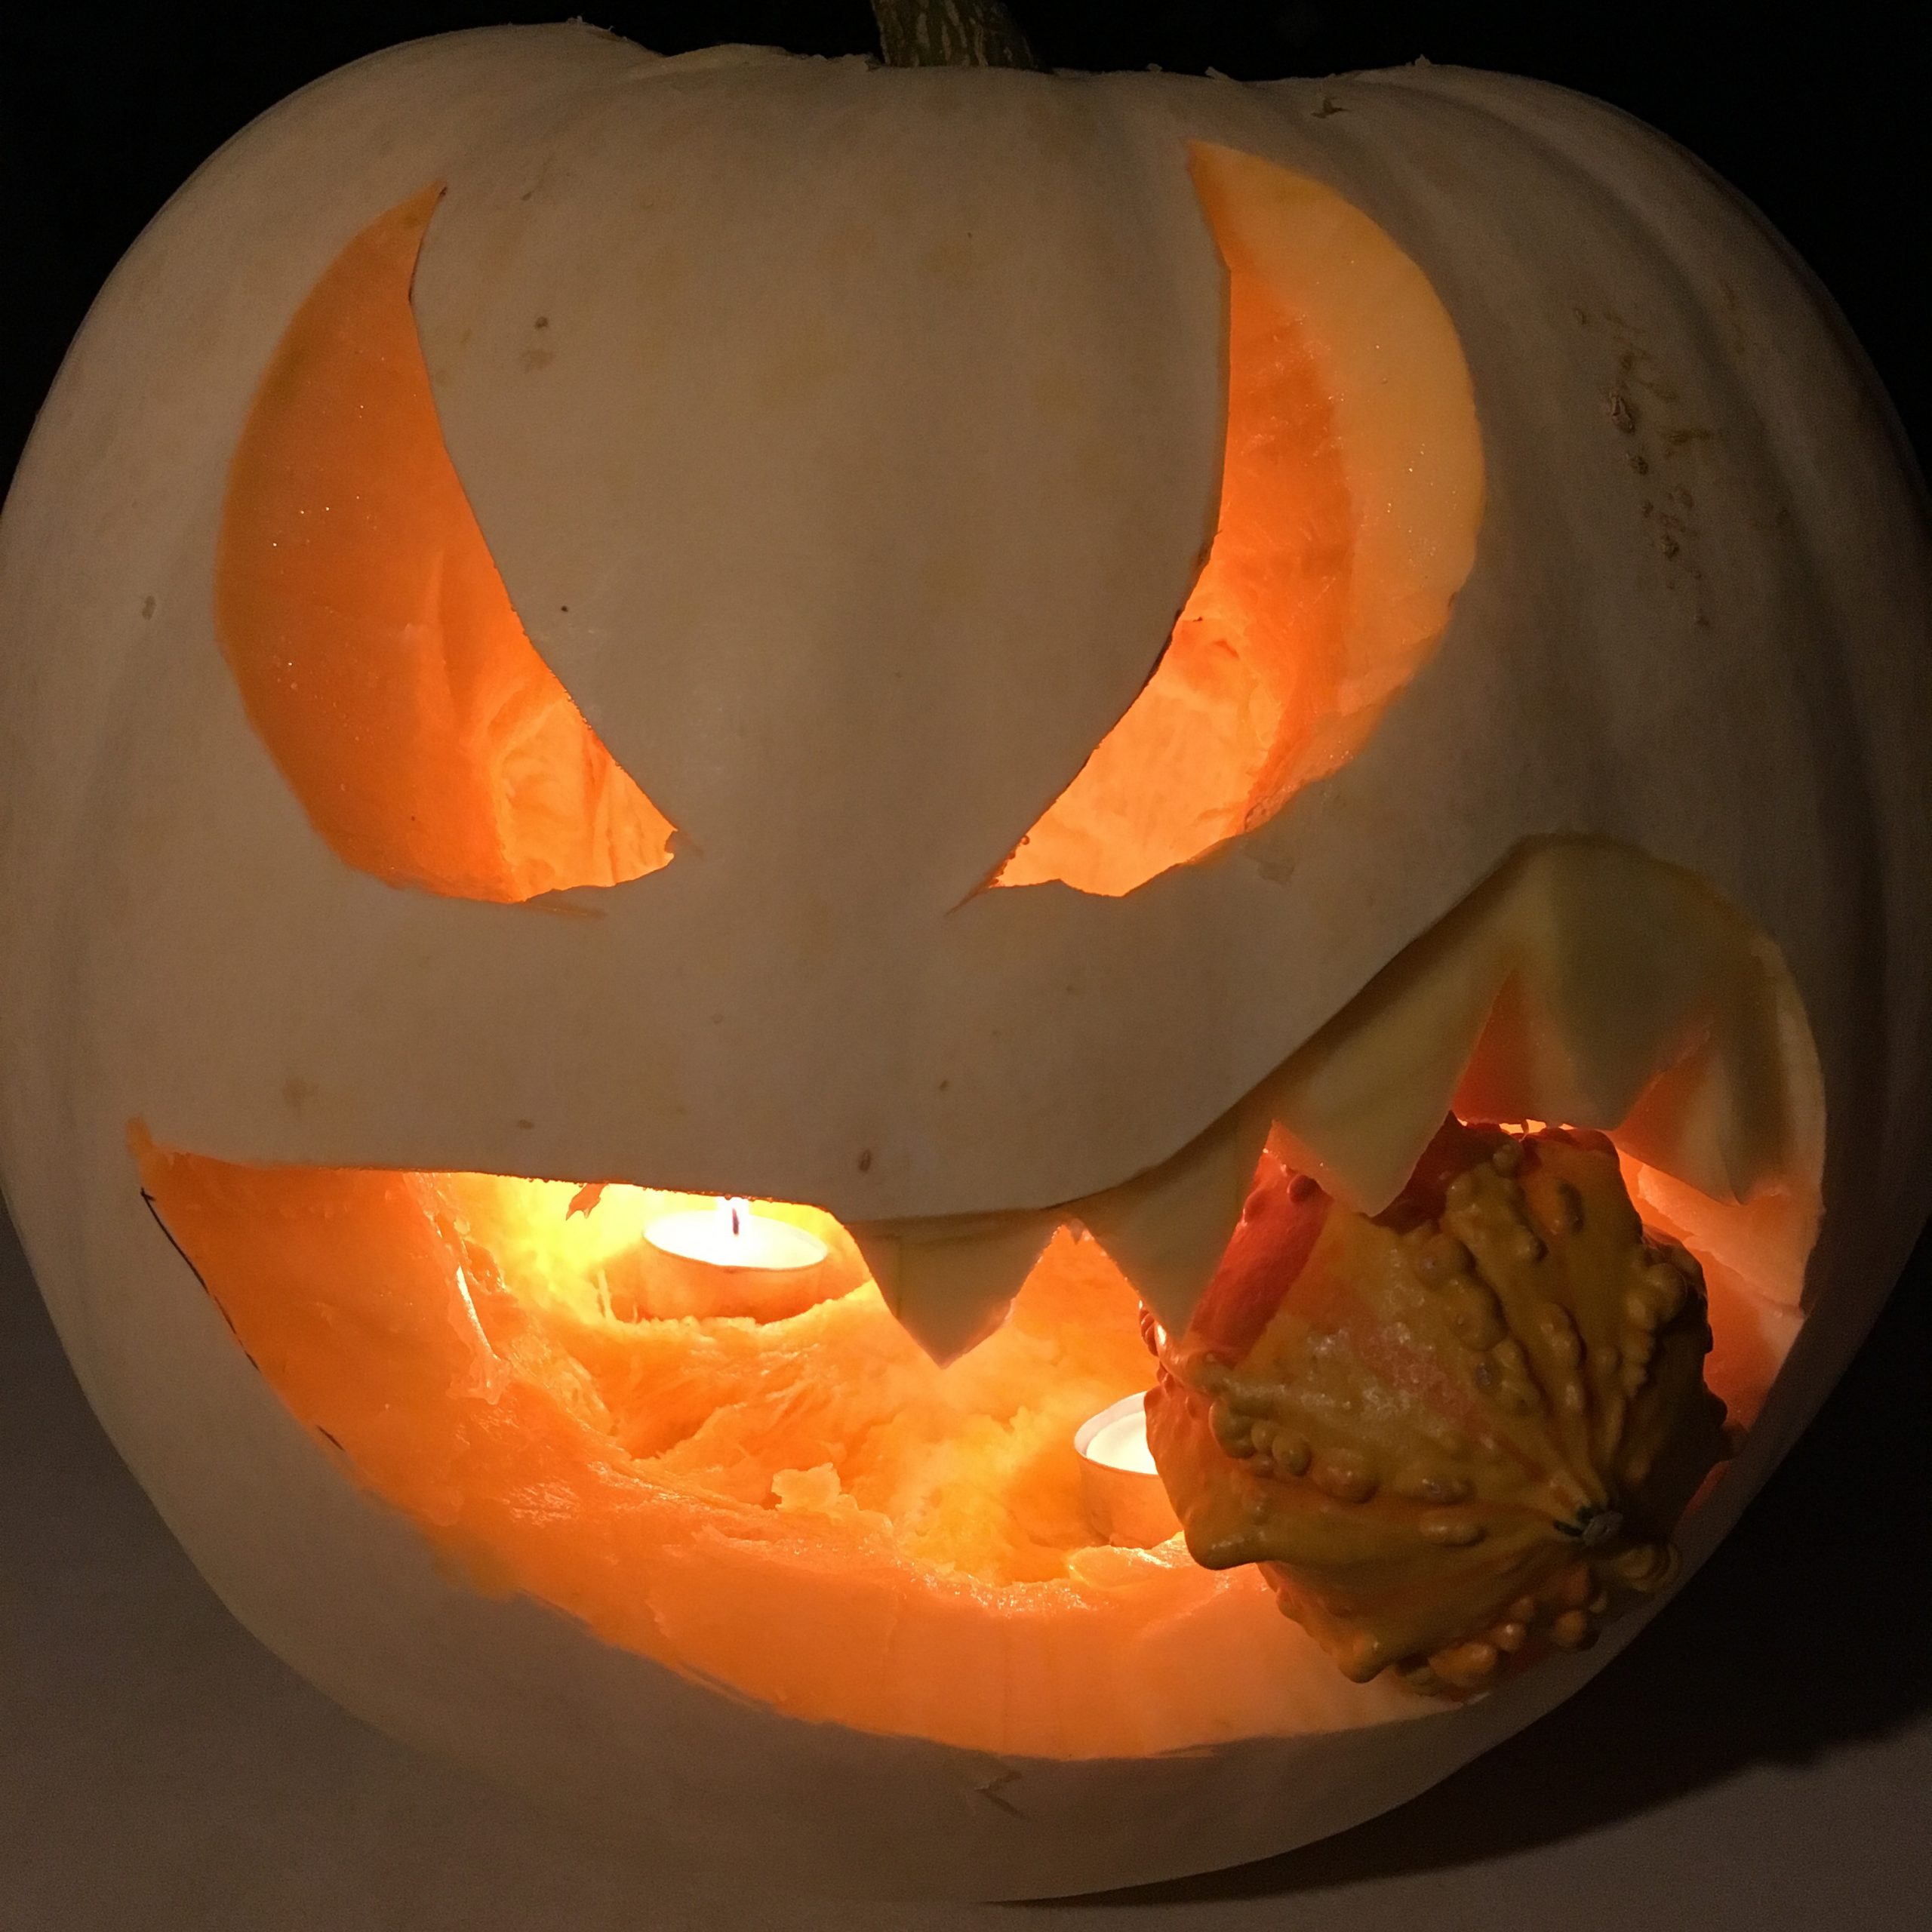
The Cannibal
Last year was my first attempt to carve a creative design. I chose the pumpkin “cannibal” design purely because it looked doable and hilarious.
The trick that I found to create this design, was to draw the design on with a wet erase whiteboard marker….works like a charm and then you can wipe any excess off when you’re done.
Once drawn in place, I carved the mouth + teeth out, and created the teeth effect by simply scoring around the top line of the teeth and gently peeling the outer layer of the pumpkin up to the score. It was shockingly simple. (For my favorite carving tools see the Let’s Talk Tools section below).
Quick Tip: Make sure to measure the size of the smaller pumpkin or gourd to make sure that you carve the right size mouth to hold the smaller gourd. I almost flubbed this part up.
The end result is a stunningly spooky pumpkin with minimal effort. The perfect pumpkin design for busy schedules!
Spider-Man
My daughter’s name is Gwen, and thanks to our good friend Marc, Gwen has been a fan of the Spider Gwen comics since she was little. Of course, this year, she will be swinging around the neighborhood as Gwen Stacy.
In honor of the Spider-Verse, we completed a full spider outdoor decor theme including our big pumpkin!
For an intricate design, I’m not sure how you would complete it without drawing it on first. Again, we used a webstastic wet erase marker.
Using my favorite carving knife again (see link below), we carved out the top and eyes. The remaining design is really just scraping….lots and lots of scraping. I didn’t have a fancy pumpkin carving kit, but I did have a melon carver….and it totally worked!
The scraping of the design took about 45 minutes, but the result was great. If you have a pumpkin with a thick interior wall, we found that scraping out from the inside made the design brighter without compromising the design on the outside.
We only had a small light to demonstrate the design, but obviously the brighter the light you place inside the brighter the design will become.
Lets Talk Tools
I would recommend picking up a sturdy pumpkin carving kit, as I haven’t had one the past few years but will definitely be getting one going forward. The one from Halloween Haunters looks like a good complete set and at a great price.
My favorite pumpkin carving knife is by Cuisinart, and magically happens to be orange (it’s the smallest knife in the set shown in the link). It’s wonderfully sharp, and just the right size and strength for more precise carving.
Happy Halloween All! I would love to see your pumpkin designs as well!
Shoulders With Freckles is your source for tips and inspiration on wellness, skin care, life hacks and exclusive deals for your busy schedule. Sign up to get my posts straight to your inbox. Because let's face it, there's never enough time in the day.